Tuesday, October 29, 2013

Brew day--RIIIPA

Got a pretty early start today and things have gone well. Dropped the hops at 11:00 and man those citra hops smell good!!!

Had more volume than expected so I had to add a half hour to the bull time to cook it off. No worries though.

Learned that my rtd connections don't work for 5 gallon batches as they are to high. ...... oh well I'll just have to make 10 gallons from now on.

Monday, September 23, 2013

It's been a while

Well,  the backyard brewery has a new back yard.  I am now located in Bristol Rhode island. I have yet to brew a batch here, but hopefully soon 

Friday, May 3, 2013

Re-worked immersion / HERMS coil

I felt that during my first batch using the new system the temp took too long to change during recirculation. So I took apart my old counter flow chiller and added it to the other chiller.

So now my cooling/heating run is twice as long and should be much faster and more efficient. I've also added a second pump and another PID and temp probe.

Can't wait to brew again to see how it all works


Thursday, April 18, 2013

Upgrades....

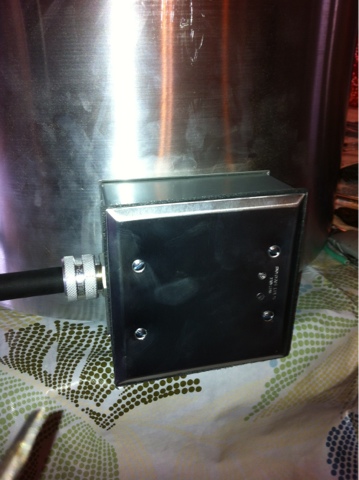
I felt that I needed a little more control and info during brewing, so I cut a couple more holes in the control box to accommodate another RTD connection, another PID, and a buzzer with a switch. It was pretty cool that just as I got done cutting out the square for the PID the mail arrived, and in the mail was the new PID!!

Now I just have to wait for the switch and buzzer to arrive, unfortunately they are coming from china so it may be another week or two.

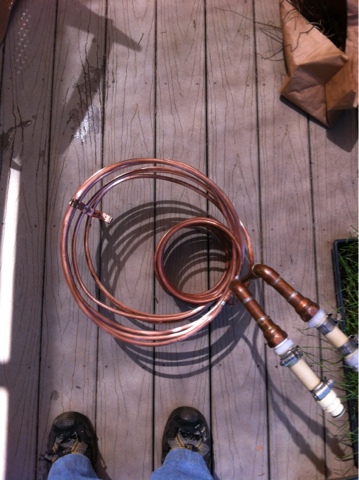
Some other upgrades include another pump which will serve to recirculate the liquid inside the HLT/brew pot to keep temps even and aid in whirl pooling during the cooling process. I also need to install the RTD probe into the pot. So that means another 3 holes in the brew pot!! That will make 6. I haven't done that yet so pics of that later.
Once done, I'll be able to brew another batch with or without the buzzer and switch.
That's it for now

Ed


Monday, April 15, 2013

found a new site for making beer labels...it is called Pixlr, and I was using the "express" editor.  Super easy to use once you get the hang of it....  Made these.....


And also this one

These are great, because I was thinking I wanted something simple like these!

Thursday, April 4, 2013

IT WORKS!!!!!

After some troubles with the control box, I got a guy who is a retired electrical engineer to come look at it.
A couple wrong connections and settings later the element fired up and I boiled some water. (Very exciting!!!!)
So here's a couple pics and video. I think the system needs to "learn " a little bit because it was overshooting the temps a bit


Thursday, March 28, 2013

Steam Hood/Vent

Wow, it's been a while....finally picked the spot where I'm gonna set up. I reworked a work bench in the basement, lowering it, and installing the 4 prong receptacle to plug the control box into.

Then I made a hood to collect the 1-2 gallons of evaporation from the boil. I knocked a hole in the wall to vent it to the garage, right next to the smaller one that I use to send the beer from the chiller into the conical fermentor when I'm brewing in the garage.

I have to wait for the liquid nails to dry before I attempt to install the hood and connect it to the vent. Maybe tomorrow I can test it out!!!!!


Wednesday, February 20, 2013

IPA is bubbling nicely!!

The IPA is doing nicely so far. I am sure it would probably be a steady stream of bubbles if I were using an airlock instead of a blow off tube. The last beer made a mess so I kept the blowoff on there.


Brewed Today!!!

Got some time to brew today....and made an IPA. Things went pretty smoothly, although I wasn't able to use the new system yet since I needed a new part for the pump.

I didn't quite hit my marks for the efficiency, but it will be OK.


Tuesday, February 12, 2013

The Box is Done!

Finally got the control box all wired up. The false bottom (mesh pizza tray) has arrived, now I just need to add some bolts or something else to elevate it above the heating element.

I had to re-order the thermal probe as I wasn't paying attention when I ordered it and got one with metric threads instead of NPT. and lastly, I need to wire up an outlet to hook it all into, which means I need to figure out "where" I want to do my brewing.

Unfortunately I'm sitting at the dealership getting the wife's car fixed so I have some time to kill. :-((


Saturday, February 9, 2013

More Work Done on the Control Box

Check out the pics.....I have all the parts, the box has been painted, and I'm getting it wired. I'll have to send the probe back, as I got it with metric threading instead of npt.

Ordered an aluminum mesh pizza tray that will fit perfectly into the bottom of the pot that I will use for my false bottom. Once I have that and the new npt probe I'll be ready to brew.....assuming all my wiring is correct and I don't fry myself!!!


Thursday, January 24, 2013

Control Box

The control box is coming along....just need a few more parts for the exterior....the master key switch and a red light to go with it, and the receptacle for the rtd (thermo coupler).

For the inside, I still need the 2 relays and all the wire and the incidentals to hook everything up.

Overall, the only things I need after that are the pump (and associated plumbing), the rtd and a false bottom to keep the mesh bag off of the heating element.

It's getting there, and I can't wait to brew with the new system!!


Wednesday, January 23, 2013

The Pot

Got a lot done on the brew pot today. Installed the ball valve and pickup tube, wired the element and finished the cord, and put together the sight tube although that's not installed yet because I need some washers and o-rings. See the pics...


Monday, January 21, 2013

Heating element installed

I got a couple of holes drilled into my new pot....go figure, you buy a pot and drill holes into it, sounds a little crazy!!!......and I got my heating element installed. It looks just like the one they use at +the electric brewery. Unfortunately I didn't put the right size hole in for my ball valve and now I have to wait for different sized washers and silicone o-rings. Which I will have plenty of extra of and will be willing to part with some.

The control box is coming along nicely...again, waiting on some parts and have yet to order others. I should soon be able to have the box totally prepped enough that I can get it painted and put all the exterior parts on.

That's it for now....picture update tomorrow!

Monday, January 14, 2013

First post

OK, so I guess I'm gonna start blogging, so I can get some ideas out there for other hombrewers who want to build a better brewing system.  I've been brewing for about 18 years....off and on..... but I've been getting more serious about it lately.

A great site to go if you are a real dreamer is www.theelectricbrewery.com as they have a killer system and really good instructions on how to do it yourself.

I was thinking of making a 3-vessel system, but the  other day I learned more about BIAB brewing and I think I am going to give that a little more attention.

Thats it for now.....

Pictures and stuff coming later!!!

Ed